


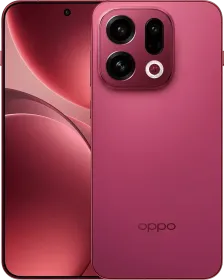
The OPPO Find X9 and X9 Pro sit among the most versatile camera phones of the 2025 – 2026 flagship cycle. At first, they work well on their own. Once you start exploring the camera app, you realise there is a lot more control sitting quietly in the background. Small changes in how you shoot can make a noticeable difference to your photos.
In this piece, we’ll be sharing practical camera tips that come from everyday use and focus on getting consistent, natural-looking photos. Most of them also apply to older OPPO phones like the Find X8 and X8 Pro, since the overall camera approach and tuning have stayed familiar across generations.
Start with the Basics: Composition and Setup
Before changing lenses or modes, set up the camera app properly. Go to Settings, then Composition assistance, and turn on Grid to enable the rule-of-thirds overlay. This helps keep framing balanced. Enable Level as well. The horizon indicator is helpful for keeping your frame aligned properly.

Also, make sure you are shooting in 4:3 aspect ratio to take advantage of the entire sensor.

In the viewfinder, tap the zoom icons instead of pinching. On the main camera, tapping 1x lets you switch to 28 mm or 35 mm equivalents for tighter framing. On the 3x telephoto, you can tap to jump to 85 mm. On the X9 Pro’s 6x ISZ, tapping unlocks 300 mm, which is roughly 13.2x. Most of these focal lengths also work in Portrait mode and Master mode as well, which gives you flexibility without degrading quality.

ALSO READ: OPPO Find X9 Review: A Great Find if You Know What You’re Looking For
Main Camera: Your Everyday Lens
The main camera is the most reliable lens on both phones. The Find X9 uses a 50 MP Sony LYT-808 with a 1/1.4-inch sensor and f/1.6 aperture. The X9 Pro steps up to a 50 MP Sony LYT-828 with a 1/1.28-inch sensor and f/1.5 aperture. In daylight, both deliver strong dynamic range, pleasing color, and low noise.


In good light, stay in the default photo mode, which captures 50MP photos by default. It captures the most detail without slowing down the shot, thanks to OPPO’s parallel processing.


In low light, let the phone switch automatically to lower resolution modes like 26 MP or 12 MP. Keep HDR on Auto and avoid placing intense light sources directly in frame if possible.


The X9 Pro has a small advantage at night, holding onto highlight detail in neon signs and headlights a bit better.


Ultra-Wide: Use with Intention
The 50 MP ultra-wide on both phones works best in daylight. Colors match the main camera well, and distortion is controlled. It’s great for close-ups as well as landscapes. You can try a lot of creative shots using this camera. Use grid lines to keep horizons straight when shooting wide scenes.


Telephoto: Controlled Zoom Works Best
The 3x periscope is one of the strengths of both phones. On the Find X9, the 3x to 6x range is clean in daylight, with natural depth for portraits. Past 10x, sharpening becomes obvious, so it is better to stay under 30x for usable images.


The X9 Pro’s telephoto setup is stronger overall. Its larger sensor and brighter aperture keep detail intact up to around 15-30x without heavy processing. Indoor shots also hold together better than on the previous generation.


Tapping 3x gives access to 85 mm, which is ideal for portraits with compressed backgrounds. The 6x ISZ at 140 mm works well for distant subjects, with solid stabilization and HDR. You can tap for 300 mm when needed, and the results are quite good.


The most effective way to use the 3x camera is to lean into its natural depth. Step back slightly, frame tighter, and let the lens create background separation on its own. This often gives a more realistic look than portrait mode. You can also use the same technique in portrait mode as well.


You can also use the 3x camera for the “what I see vs what I take” trend. Frame the scene at 0.6x to show the full context, then switch to 3x, 6x, 10x, or 13.2x and isolate a single subject or detail that stood out to your eye. The natural compression and background blur make the second shot feel intentional and dramatic, even without heavy editing, which is why the telephoto lens works so well for this style.

ALSO READ: OPPO Find X9 Pro Review: A Serious Step Forward
Macro: Different Approaches for Each Model
Macro shooting works very differently on the two phones. On the Find X9, skip the ultra-wide macro unless there is no alternative. It creates distortion and isn’t very detailed. A better method is to use the main camera or the 3X. Step back to around 42 cm, zoom to 6x, and crop slightly later (make sure to turn off the auto macro icon).
Depending on the condition, you could use the 2x crop from the main sensor by getting as close as possible. It keeps textures natural and avoids the long focus distance of the telephoto.


The Find X9 Pro handles macro much better. The 3x telephoto focuses as close as 10 cm, enabling true telemacro shots. This works well for textures like leaves, fabric, and small objects, with strong subject separation and compression.


There is also a dedicated macro mode on the X9 Pro, where you can choose between two styles: Natural and Full-Clarity. Natural is enabled by default and keeps the look simple and realistic. Full-Clarity uses focus stacking to pull more of the scene into focus, which helps because the depth of field on the 3x camera at around 10 cm can get extremely shallow.
That said, Full-Clarity can produce odd artifacts at times and it needs very steady hands to work properly. In most cases, sticking to Natural gives more reliable results, and the Full-Clarity option is best saved for situations where it’s really necessary.
Portraits: Flexible and Natural
Portraits are a strong point on both phones. Edge detection is reliable and skin tones look realistic. Turn off beautification for natural results. The 3x lens is ideal for portraits, and you can zoom smoothly up to about 3.6x. Available focal lengths include 23 mm, 35 mm, 48 mm, 70/73 mm, and 85 mm.
The X9 Pro benefits from its larger 3x sensor, which produces smooth background blur and great transition from subject to background. The X9’s portrait mode is also just as impressive.


If you want to see more of the background, try shooting at a higher f-stop (bottom left) and maybe even switch from 3x to 2x. Use 3x or 3.5x when you want to keep the subject and background as close as possible.


The 50 MP autofocus selfie camera on the Pro also helps with group shots and low-light selfies. The standard X9 uses a 32 MP fixed-focus front camera, which is fine in good light but less flexible.


Hasselblad portrait filters add subtle character. Misty, Glowing, and Dreamy work well for backlit scenes but I wouldn’t recommend using them all the time.
Unique Shooting Modes Worth Using
Several dedicated modes are useful in the right situations. Silhouette mode captures clean outlines against bright backgrounds, which works well for sunsets and backlit shots. Fireworks mode helps capture bright lights/fireworks really well. And Stage mode balances exposure in concerts or performances. These can be accessed by tapping the Photo/Video mode button.
There’s also a Snapshot mode, which freezes fast movement using higher shutter speeds. It works well for sports, pets, or anything that’s moving. Pair it with Live Photos to capture moments before and after the shutter press. On the X9 series, Live Photos can reach up to 4K in Ultra-Clear mode.
Master Mode: More Control Without Complexity
Master Mode is available on both phones and supports JPG, JPG Max, RAW, and RAW Max. You can adjust sharpness, contrast, saturation, color temperature, and vignetting before taking the shot. Auto exposure works well, but Pro controls let you fine-tune ISO, shutter speed, focus, and more. I would recommend using RAW Max if you plan on editing your photos later.


The interface is easy to use, although switching between filters can feel slow. Film-style profiles like CC Film, NC Film, and NH Film offer different color responses. I would recommend trying out all the different filters for yourself. Master Mode is best when you want editing flexibility or a more creative look, but it does not support Night Mode or extreme zoom beyond 10X.


XPAN Mode: Wide and Cinematic

XPAN uses a 65:24 aspect ratio inspired by Hasselblad film cameras and works well for landscapes, architecture, or whatever your creative mind tells you. The new interface includes a negative film animation, which cannot be disabled, so you’ll have to wait until you can take your next shot.


Color profiles include Original, Black and White, Fresh, Clear, Emerald, and Neon. Neon is great for night scenes and you should definitely try it out.


You can also convert regular photos to XPAN in the Photos app using the XPAN crop preset, but I think actually shooting in XPAN gives better results.


Filters: More Than Simple Overlays
OPPO’s filters are based on 3D LUTs rather than flat overlays. You’ve got Fresh, Emerald, Neon, Cold Flash, Warm Flash, and a number of other filters at your fingertips. These filters work in almost every mode, including the standard mode, Master mode, and the Portrait mode. In my opinion, the Neon pairs especially well with the night shots.

Final Tips

Try Hasselblad Ultra-Clear mode on the X9 Pro when shooting static scenes. It uses 200 MP capture and frame stacking for maximum detail. Turn off AI Telescopic Zoom if you prefer natural textures. The Quick Button on the X9 Pro is useful for fast camera access, but the on-screen shutter gives better stability.
So these were the tips that I wanted to share for you to get the best out of your OPPO Find X9 and X9 Pro. Let me know which one was your favorite and if you have any other tips that you would like to share with us, feel free to leave them down in the comments section below.

You can follow Smartprix on Twitter, Facebook, Instagram, and Google News. Visit smartprix.com for the latest tech and auto news, reviews, and guides.


This would have to be the best description of how to actually best use the Oppo Find X9/Pro phones for mobile photography that I have seen on the internet. It is absolutely brilliant - thank you very much for taking the time to provide such a comprehensive review of the photographic capabilities of these remarkable camera phones!